How to Improve Vocal Recording in a Small Home Studio

Getting broadcast-quality vocals in a bedroom or small office is usually a struggle against physics, as opposed to the absence of expensive equipment. The narrow rooms are bound to have flutter echo and boxy resonance, whose sound waves are echoed at a high rate and blur the accuracy of your recording. To correct this, what should be given priority is not the upgrading of your microphone but rather controlling your environment.
The audio engineers of iZotope, one of the industry leaders in audio production software, say that the acoustic space is the most frequent error of home producers. They insist on the fact that a mere microphone in a well-treated room will always perform better than an expensive microphone in an untreated reflective room.
The following are simple tips that can be employed by any home producer and vocalist to record superior vocals in any tight environment.
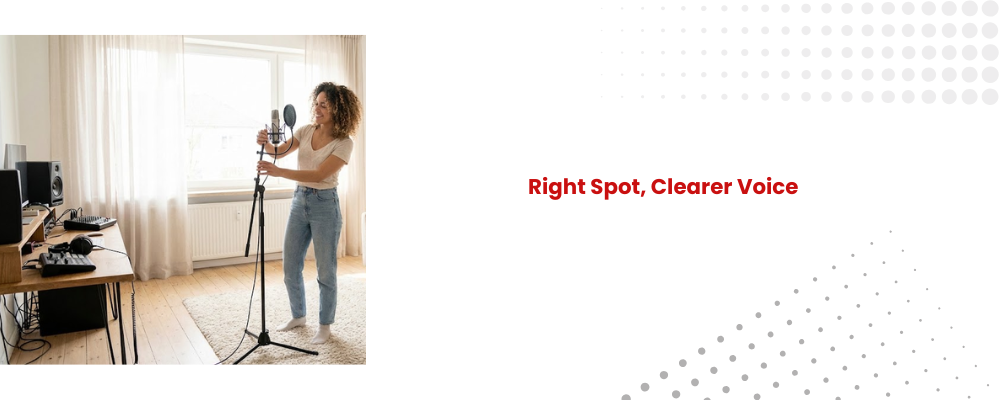
Choose the Best Spot in the Room
Every room has spots where vocals sound better and areas where they sound worse. Hard walls and empty corners bounce sound back into the microphone. This creates an echo that makes the recording muddy. To improve clarity:
Record away from walls so your voice doesn’t bounce straight back into the mic
Try the center of the room or a spot where soft furniture absorbs sound
Avoid hard surfaces like windows and tiles, as they increase reflections
Always choose a position that helps the mic capture your voice cleanly, without unwanted room noise.
Control Room Acoustics
A small room doesn’t need expensive acoustic panels to sound better. Simple adjustments can greatly reduce echo and improve recording quality.
Hang heavy curtains, blankets, or duvets behind and around the mic to absorb reflections
Add rugs or carpets if the floor is bare, especially if the room has tiles or hardwood
Place pillows or foam behind the singer to stop stray sound from bouncing back
Use a portable vocal booth or reflection filter to create a focused recording space
Even these basic fixes can turn a noisy room into a more controlled recording environment.
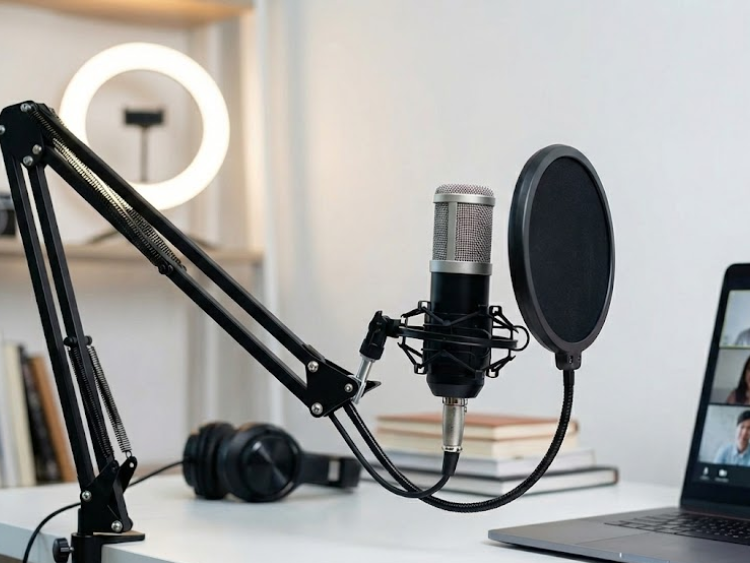
Use the Right Microphone Technique
Even the best mic won’t deliver quality if used incorrectly. A few adjustments matter a lot:
Maintain 6–8 inches distance from the mic
Keep the mic slightly above mouth level for clearer tone
Angle the mic slightly off-axis to reduce harsh consonants (“P”, “T”, “S”)
A pop filter in front of the mic is a must to prevent plosive bursts of air.
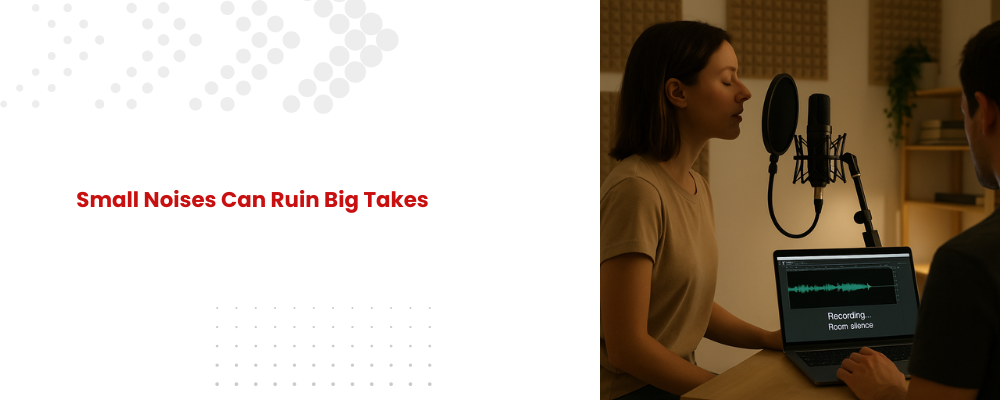
Reduce Noise From Surroundings
Small home studios pick up even the smallest sounds. Eliminating unwanted noise makes mixing much easier.
Turn off fans, AC, or buzzing appliances before recording
Close doors and windows to block outdoor or household noise
Stay still during recording to avoid chair squeaks or cable tapping
Record a few seconds of silence at the start for easy noise reduction later
Good noise control leads to cleaner, more professional results.
Gain Staging for Clean Sound
Setting the right input level is essential to avoid distortion and background noise.
Peaks should stay between -10 dB to -6 dB — this prevents clipping
Average volume should remain around -18 dB to -12 dB for clean clarity
Too low = more hiss and noise
Too high = harsh distortion
Balanced gain ensures every take remains usable.

Use Double Takes and Layering
Great vocals are built layer by layer, not recorded in one perfect pass.
Double-track chorus lines to make them wider and more powerful
Add backing vocals to create depth and interest in the mix
Use comping — choose the best parts from several takes
Layering adds richness and makes your vocals sound studio-quality.
Add Effects Carefully
Reverb and delay can enhance emotion but too much can make vocals sound distant or messy in small rooms.
Tips:
Start with light reverb, then adjust slowly
Use subtle compression to smooth dynamics
Apply EQ to reduce mud around 200–400 Hz
Always focus on clarity first — polish later.
Final Thoughts
Recording vocals in a small home studio doesn’t have to sound small. With smart acoustic treatment, proper mic placement, and careful noise control, you can capture clean, powerful vocals that stand out in any mix. These practical techniques will help your voice shine — even in the smallest room. If you’re ready to boost your vocal quality, check out some carefully selected gear that works well for small home studios — from microphones and pop filters to budget-friendly vocal booths. Explore studio gear recommended for small home vocal-recording setups.
Recent Posts